MD3220i Disk Group Expansion

Now that I’ve finished migrating data from one disk group to another on my MD3220i, I needed to break down the old disk group (14x300GB 10k SAS) and then use those disks to expand another disk group from the original purchase (16x300GB 10k SAS) giving one big RAID10 array of 30 disks.

I basically went backwards from adding storage, by:

  • Removing the Cluster Storage Volume (within Failover Cluster Manager)
  • Deleting the Virtual Disk as available cluster storage (within Failover Cluster Manager)
  • Remove the host-to-LUN mapping (within the Dell MD Storage Manager)
  • Delete the Disk Group and Virtual Disk (within the Dell MD Storage Manager)

Following those steps, I had 14 disk available storage to re-allocate.

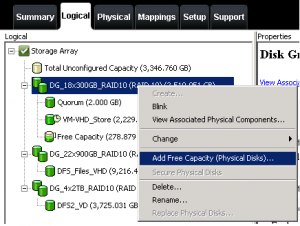
I then went to the Logical tab, right clicked on the disk group, and selected “Add Free Capacity”


This gave me a list of disks to use, but I could only select two; the wizard wouldn’t let me select the full set.

Unfortunately, I chose two and completed the wizard, which went directly into reconfiguring the Virtual Disk. This is unfortunate since it’s a 14 hour operation, and I really don’t want to do that 7 more times (for each pair).

I took a look in the CLI guide for the MD3220i, but there doesn’t appear to be any options for adding free capacity to a disk group. At this point I’m stuck waiting for each disk pair to be added.


Adding a Dell MD1220

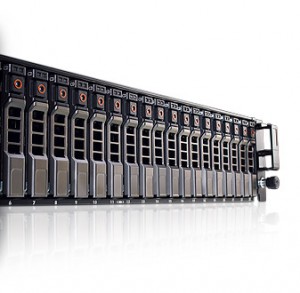
Last week was storage expansion week for me; my team and I added a Dell Powervault MD1220 to our existing SAN controlled by a MD3220i.

We got a full unit loaded with 24 x 900 GB 10krpm SAS, and I was shocked at how quickly it shipped to me. Thanks Dell!


The actual installation was incredibly easy, and we had the storage running within 10 minutes. The technical guidebook said that the MD3220i needed to be powered off to add the expansion, but based on the discussion here and the fact that the MD1220 was brand new and empty, I decided to do it live.


After connecting the SAS cables and turning on the power supplies, the MD1220 went through a startup check, and then by the time I got back to my computer with the MD Storage Manager software on it, it showed 19 TB of available space to be allocated.


From that point, it was as simple as creating a new disk group and virtual disks. I added that virtual disk to our host mapping group, and the storage was immediately visible to my Hyper-V cluster hosts through iSCSI; I didn’t have to re-do any iSCSI configuration.


I set up the new virtual disk as a Cluster Volume within the Hyper-V Cluster, and then downloaded a trial of System Center Virtual Machine Manager 2012 to use for the storage migration of the VHD’s that need to go on this new cluster volume.


Once those migrations are done, I’ll remove one of the old cluster volumes, break up corresponding virtual disk within the MD Storage Manager software, and expand other virtual disks with those available hard drives. Hopefully I don’t find anything surprising while doing this; unfortunately this type of operation isn’t well documented from what I can find.

Processor & RAM upgrade on Dell R410

Have I said before that I love virtualization? Because I really, really do.

In my original Hyper-V implementation, I used two Dell R410’s, each with 32 GB of RAM (4 sticks) and 1 Xeon 5630 processor. It’s been a little bit of time since then, with some additional VM’s brought online for various services. My benchmarks showed it was time to upgrade the cluster, mostly for RAM failover amounts; I can’t go below 50% available RAM otherwise all the VM’s won’t be able to run on one host.

So I called up my Dell rep, ordered 2 x Xeon 5630 and 8 x 8 GB of RAM, and today installed them.

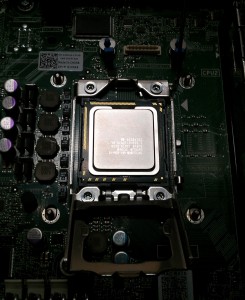
Intel Xeon


The install went very smoothly, and because of the Hyper-V cluster and Live Migration, occurred in the middle of the day without downtime or interruption.

This is the process I used:

  • Manually drained a host (Windows Server 2012 will have this as a feature, which is nice).
  • Performed Windows Updates and a BIOS update from Dell
  • Restarted the server, and entered BIOS setup to ensure latest version applied successfully
  • Turned off server, slide out from the rack (Man do I love the RapidRails).
  • Opened up the chassis, removed the shroud covering processors and RAM
  • Added 4 sticks of RAM
  • Removed the CPU filler, and inserted the new processor.
  • Attached the passive heatsink, and screwed it into the mounts.
  • Turned on the server.

And that’s it! Just like that, I’ve doubled the capacity of my infrastructure, and it took under an hour.


Future Technology can’t come soon enough

As I’ve been reviewing my Hyper-V and storage infrastructure at work, I can’t help but wish that future technology was available right now.

Primarily, I wish I had production ready releases of:

  • Windows Server 8 (For Hyper-V 3.0)
  • 802.11ac devices

Within my environment, running on our Dell MD3220i SAN I’ve got a file server VM with multiple VHDs attached. Most of these VHDs correspond to a DFS folder target that is being replicated using DFSR. The problem is that the folder target storing the majority of files is projected to grow beyond 2TB before the end of 2012.

My short term plan is to use a passthrough disk to a new LUN on an MD1220 attached to our SAN, but I’d really like to keep it contained within a VHDX file from Windows Server 8.

The reason for that is BACKUPS. The plan I’m thinking about right now is to use Hyper-V Replica to an offsite server for disaster recovery, with file-level backups of the contents of our VMs to an offsite NAS using some method of dedupe and compression. Again, waiting on Windows Server 8 for that.

The issue with this backup plan is connectivity to our offsite location which is a building across the parking lot from our head office that we lease.

Right now it’s connected by an 802.11a connection at 54Mbps. That’s really too slow to be able to do backups across, especially when we’re looking at just 500GB of Exchange data.

I’d really love to be able to set up an 802.11ac device that provides up to gigabit throughput. While I have read manufacturers such as Broadcom are working on these chips, they’re not commercially available yet.


The implementation of just these two things would make me much happier with my infrastructure and give me better scalability for the future.


Performance Monitoring Hyper-V Part 1 – Setup

There are many sites out there that document how to monitor Hyper-V performance, but only a few of them have any detail on the actual setup and results of the monitoring. Perhaps this post (and the next one coming) will assist you, or perhaps it will only be of benefit for my personal reference documentation.

Its sad to admit, but until this month I hadn’t spent any large amount of time looking at my Hyper-V cluster to check for performance issues because I’ve been so busy. With the addition of new staff at work (invaluable!) I’ve had the chance to get caught up on actual system administration.

In addition to the necessity of doing this because it’s the right thing to do, there’s a new software implementation that is being considered, and I wanted to make sure I wasn’t over-selling our cluster capabilities.

Real-time active monitoring

Hyper-V Windows Gadget: Made by Tore Lervik. I found this tool about 2 weeks after my initial implementation. Right now I’m only using it for active monitoring of the guest CPU performance, but it has many other features that make it worth downloading.
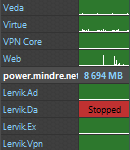
Hyper-V Monitor from Tore Lervik

Hyper-V Mon.exe: This was discovered while reading a post at the excellent Hyper-V.nu by Peter Noorderijk. The actual post detailing this (and other monitoring which I’ll get to) is here. I really like this tool because it gives the actual CPU utilization of your hosts, in addition to other data.
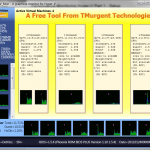
 

Scheduled Monitoring and Analysis

A very useful tool that I discovered through the Hyper-V.Nu blog post is the “Performance Analysis of Logs (PAL)” tool. It can be found here on codeplex. This tool provides the ability to set a Performance Counter profile, export it to a Data Collector Set, and then import the results for analysis.
I won’t detail how to set up and use the tool in full here, as it’s been covered by Peter at the Hyper-V.nu link above, however there are a couple things to mention.

If you’re trying to use this with Hyper-V Server (as opposed to Windows Server with Hyper-V role) you’ll find that you can’t just run Performance Monitor to import that data collector set; instead you’ll need to use the Logman command.

But before you do that, you must modify your exported XML template in a text editor, because the Logman command is going to throw an error unless you don’t. When you open it up, look at line 5 & 6:

<Name>PAL_Microsoft_Hyper-V_R2_SP1</Name>
<DisplayName>@%systemroot%\system32\wdc.dll,#10026</DisplayName>
<Description>@%systemroot%\system32\wdc.dll,#10027</Description>

For some reason, logman doesn’t like the dynamic DisplayName and Description that are used by default. Change these to some static value, and save the xml file.

Next, copy the xml file to your Hyper-V host, and then remote into the host and run the following from the command line:

logman import Hyper-V_Monitor -xml "c:\Hyper-v_Counters.xml"

Then you can start the counters with:

logman start Hyper-V_Monitor

By default the results will be saved in C:\PerfLogs\System\Performance on your host. If you want to schedule the start and stop, you could use schtasks.exe to schedule the logman command.

Once you have the output from performance monitor, you can load it into the PAL tool as described at Hyper-V.nu, and view your results.

In part two, I’ll review my results and what I’ve found about them.