Expand page height based on iframe source

Since I’m using Mindtouch Core as an intranet site for my company, I have decided to encourage its further use by collecting the various tools and custom sites I have built into one area. Rather than require personnel to have bookmarks to a variety of different tools, I have created a links page within our Wiki, and sub-pages with iframes to each of the internal tools.

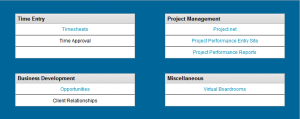
Toolbox display of links


The problem is, each iframe within a Wiki page needs it’s height set, and if I statically set it, sooner or later its going to be too big or too small. I want the height of the iframe to scale dynamically with the height of the content in the iframe.
This normally isn’t an issue, however the Wiki and source of the iframe are considered cross-domain; they’re on separate servers at separate paths. Most javascript solutions won’t work with this type of setup.

Luckily I found someone who does have a resolution. Full credit goes to John and his post here from 2006.

I will document how I got this to work within a Mindtouch wiki page, as that was the primary source of my problems with this code.


First, you’ll need to create a file with the following code:


    Resizing Page


Resizing IFrame...

Then, transfer this file to the filesystem of your wiki. I placed mine in /var/www/dekiwiki/config.

On the site that you want to appear inside the iframe, you need to add a few things. In the HEAD section:


In the above code, you must make sure your iframe ID matches, and the wrapper ID (I'm using a div tagged as 'container'. Also, the last line should point to the file you put in the wiki filesystem.

Then, in the BODY tag, add:


And then finally somewhere inside this source page, add a hidden iframe that matches the ID in the javascript above:


Now, all that remains is to put an iframe on your wiki page, and then somewhere on the wiki page, paste the following in the WYSIWYG editor:

{{    }}

The ID in that javascript should match the iframe ID on your wiki page.

That's all you need; now the iframe in the wiki page should dynamically expand with the contents!
Hide file revisions on Mindtouch page

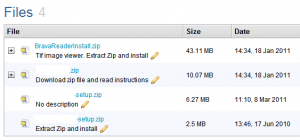
I’ve currently got a Mindtouch Wiki set up in my company, and a recent request came in to be able to hide file revisions for individual pages. After a bit of searching through the Mindtouch developer site and forums, I found the CSS code necessary to hide the “+” icon to expand the list of file revisions.
To apply this, first create a new template, from your templates section: http://yourwiki/template:

In your new page, switch to source view, and paste this in:


<style type="text/css">/*<![CDATA[*/
#attachTable .group {
display: none !important;
}
.groupparent .col1 a {
display: none !important;
}
 /*]]>*/
 </style>


Now you can simply call that template from the toolbar on the page you wish to hide file revisions:

CKEditor toolbar with Templates shown


Here’s the difference:


Mindtouch Core – Wiki & Intranet

At my company I’ve been using Mindtouch since it was called Dekiwiki. Its use is primarily as a company intranet, with resources, documentation and a gathering place for certain tools.mindtouchlogo

This post is the first about our implementation, and my intention is to demonstrate what is capable with Mindtouch Core in a practical manner. This type of information is notoriously hard to find from Mindtouch, as they are a company very much set on buzzwords and corporate speak.


As a wiki, intranet or document port, I really do recommend Mindtouch. It is incredibly easy to set up, very easy and friendly to use, and has vast potential for customization.

If you want to get started, I’d recommend you download the VMware image from here:

http://www.mindtouch.com/downloads

I believe you will need to register for a license of Core, which is free.


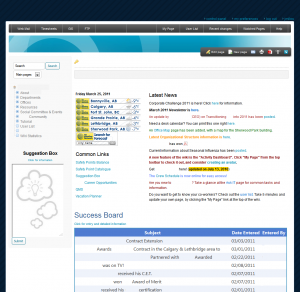
So diving in, here is the front page of our wiki (excluding some identifiable information):

Click for full size

This is using a customized version of the Beechbeta skin, with modifications such as:

  • Changed to a dynamic width skin instead of fixed
  • background tiling to match corporate colours
  • Additional links underneath the logo placement (logo hidden in this image, its top left usually)
  • Certain CSS sizing of elements.

We have enabled single sign on, so as long as the user is authenticated with Active Directory, the wiki will use those credentials to sign in.

On our front page, I am using a template to display weather for our regional offices, with a simple table beside that for current news which is updated manually.

The success board is an iframe, which displays a custom gridview from a minor database.

On the left you can see a suggestion box, which is an html form that is linked to php code that automates email submission.


Our page structure is shown on the left, where most of the content is specific to a Department, an Office (geographical) or company wide (Resources).

Here are some of the practical uses we’re using Mindtouch Core for:

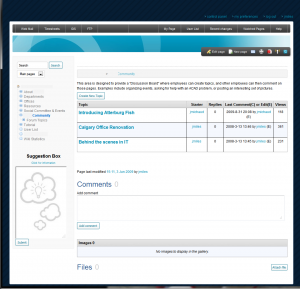
  • Community forum/discussion area
    Click for full size


  • Embedded media
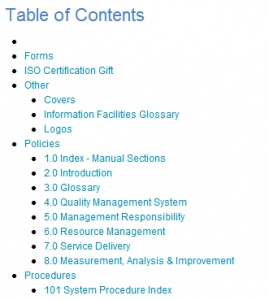
  • Documentation reference
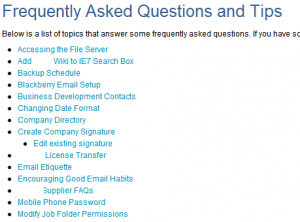
  • FAQ pages and instructions
  • Links page (many staff bookmark this page)
  • Accessibility to various internal tools and sites, such as Vacation Planner, Suggestion Box, etc.
  • Program distribution through files page


We are also trying to promote the personalize page feature of Mindtouch. Every user has their own personal page, which can be made into a biography, notes, or photo dump.

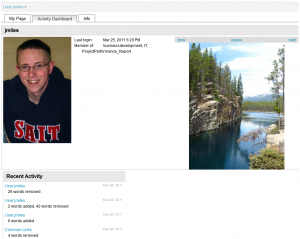
Recently Mindtouch has added an “Activity Dashboard” which is useful. I’ve added a slideshow of any photos added to a user’s personal page onto this Dashboard:

As well, we’ve added a tab with Info about the user, pulled from our Active Directory. I would have really liked to get this on the Activity Dashboard tab, but that is beyond my coding skills.


So that in a nutshell is how we’re using Mindtouch. In the future I’ll post more on the specific tools we’re using and how they’re created.

If you’d like information on how any of these features or customizations are done, leave me a comment!


HTML form for PHP email submission

At my company we use a software product called Mindtouch Core as a company Wiki/intranet. A future post will detail our implementation.

One feature request was to automate the vacation request procedure in our company.

Because we wanted to keep it simple, is it not fully automated or database driven, but automates the sending of email through the use of a HTML form to a php page.

I make no claims on this being ‘good’ code, as I’m not a coder. However, it is functional and serves it’s purpose.

HTML Form

This is the current contents of our HTML form, with comments for explanation.

<!-- Location of the PHP functions to execute email submission. This resides within our Mindtouch file system -->
<form method="post" action="/config/vacplanner/vacemail.php">

<!-- Script used to auto-hide the sub-departments. Note the specified sub departments specified in orange. -->
 <script type="text/javascript">/*<![CDATA[*/
var hide=['business-sub','finacct-sub','next','id2'];
function setOpt()
{
resetOpt();
for(var i=0,sel=document.getElementsByTagName('select');i<sel.length;i++) { sel[i].onchange=function() { if(this.parentNode.tagName.toLowerCase()!='div') resetOpt(); try { document.getElementById(this.value).style.display=''; } catch(e){} ; } }
} window.addEventListener?window.addEventListener('load',setOpt,false):
window.attachEvent('onload',setOpt); function resetOpt()
{
for(var i=0;i<hide.length;i++) document.getElementById(hide[i]).style.display='none';
}
/*]]>*/</script>

Name: <br />
<!-- Using the variables built within Dekiscript (Mindtouch code) we can hide the username but auto-fill it in with whoever is viewing the page. --> 
<input name="username" type="hidden" value="{{user.name}}" /><br />

<!-- Department field uses the Select function of the form. The values are email addresses, which are passed to the php file to be used as recipients -->
 Department: <br />
<select name="department">
<option value="" selected="selected"></option>
<option value="business-sub">Business</option>
<option value="finacct-sub">Finance &amp; Acct</option>
<option value="email.address@domain.com">Engineering</option>
<option value="email.address@domain.com">Geomatics</option>
<option value="email.address@domain.com">Operations</option>
<option value="email.address@domain.com">Safety</option>
</select>
<!-- This is a sub-department, for better organization. This matches the javascript at the top. -->

<div id="business-sub">Business Sections: <select name="busdepartment">
<option value="" selected="selected"></option>
<option value="email.address@domain.com">Business Admin</option>
<option value="email.address@domain.com">HR</option>
</select></div>
<div id="finacct-sub">Fin&amp;Acct Sections: <select name="finacctdepartment">
<option value="" selected="selected"></option>
<option value="email.address@domain.com">Accounting</option>
<option value="email.address@domain.com">Facilities</option>
<option value="email.address@domain.com">IT</option>
</select></div>
<div id="id2">Element with an ID of "id2" <select>
<option selected="selected">Opt1</option>
<option>Opt2</option>
<option>Opt3</option>
</select></div>
<div id="next">"Next" element <select>
<option selected="selected">Opt1</option>
<option>Opt2</option>
<option>Opt3</option>
</select></div>
<br />

<!--Supervisors are set up the same as the Departments section -->
 <div id="Supervisors">Supervisor: <br />
<select name="supervisor">
<option value="" selected="selected"></option>
<option value="email.address@domain.com">John Doe</option>
</select></div>

<!--Section to gather vacation date information. Any type of text may be entered here. -->
 Last Working Date:<br />
<input name="lastworkdate" type="text" /><br />
Vacation Dates Requested:<br />
<input name="vacdatestart" type="text" /> To <input name="vacdateend" type="text" /><br />
Return to Work Date:<br />
<input name="returnworkdate" type="text" /><br />

<input type="submit" value="Submit" />
<!--A hidden field gathers the current date from the wiki, and submits it to the php file. -->
 <input type="hidden" name="date" value="{{ date.Date(date.now) }}" />
</form>

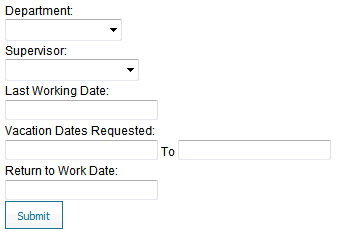
Here’s what the form looks like:

HTML form

PHP Backend

Here is the contents of our PHP form, again with comments for explanation:

<?php

// Required for email to work. Dependencies on existing files from the wiki.
require_once("/var/www/dekiwiki/phpmailer/class.phpmailer.php");
require_once("/var/www/dekiwiki/phpmailer/class.smtp.php");
require_once("/var/www/dekiwiki/phpmailer/language/phpmailer.lang-en.php");
// List of variables to gather from the vacform used on the wiki page. These map to the input boxes and department/supervisor dropdowns
$username = $_POST['username'];
$department = $_POST['department'];
$date = $_POST['date'];
$supervisor = $_POST['supervisor'];
$lastworkdate = $_POST['lastworkdate'];
$vacdatestart = $_POST['vacdatestart'];
$vacdateend = $_POST['vacdateend'];
$returnworkdate = $_POST['returnworkdate'];
$finacctdepartment = $_POST['finacctdepartment'];
$busdepartment = $_POST['busdepartment'];
// Used in conjunction with the IF statements below to add recipient.
$srchstrg = ".domain.com";
$wildcardsearch = preg_match("/$srchstrg/", $department);
$wildcardsearch2 = preg_match("/$srchstrg/", $finacctdepartment);
$wildcardsearch3 = preg_match("/$srchstrg/", $busdepartment);
// For our C-Level staff, we want the CEO to be automatically selected as supervisor. If the username is one of the below, supervisor is automatically set to CEO
if ($username=='jdoe' OR $username=='jsmith') {
$supervisor = 'big.cheese@domain.com';
}

// Error checking on empty fields
if ($lastworkdate=="") {
echo "Last Work Date was left blank. Please press Back to retry.";
die;
}

// Error checking on empty fields
if ($vacdatestart=="") {
echo "Vacation Start Date was left blank. Please press Back to retry.";
die;
}

// Error checking on empty fields
if ($vacdateend=="") {
echo "Vacation End Date was left blank. Please press Back to retry.";
die;
}

// Error checking on empty fields
if ($returnworkdate=="") {
echo "Return to Work Date was left blank. Please press Back to retry.";
die;
}

 // Error checking on empty fields, if all departments are empty
if ($department=="" && $finacctdepartment=="" && $busdepartment=="") {
echo "A Department was not selected. Please press Back to retry.";
die;
}

// Error checking on empty fields, if Business is selected but no sub-business department is.
if ($department=="business-sub" && $busdepartment=="") {
echo "A Business sub-department was not selected. Please press Back to retry.";
die;
}

if ($department=="finacct-sub" && $finacctdepartment=="") {
echo "A Finance&Accounting sub-department was not selected. Please press Back to retry.";
die;
}

if ($supervisor=="") {
echo "A Supervisor was not selected. Please press Back to retry.";
die;
}
if ($username=="") {
echo "A name was not entered. Please press Back to retry.";
die;
}
// Begin the code for the mail to be sent.
$mail = new PHPMailer();
$mail->IsSMTP(); // telling the class to use SMTP
$mail->Host = "smtp.domain.com"; // SMTP server

$mail->From = 'email@domain.com';
$mail->FromName = "Vacation Planner";

// Adds supervisor as recipient
$mail->AddAddress($supervisor);
// Used with wildcard searches above to determine if a department was selected, and if so, set that value as a recipient
if ( $wildcardsearch != 0 ) {
$mail->AddAddress($department);
}
else {
// Do Nothing
}

If ( $wildcardsearch2 !=0 ) {
$mail->AddAddress($finacctdepartment);
}
else {
// Do Nothing
}

If ($wildcardsearch3 !=0 ) {
$mail->AddAddress($busdepartment);
}
else {
// Do Nothing
}

// Sets the subject
$mail->Subject = "Vacation Request from $username";
$mail->IsHTML(true);

// Body is built from variables used in HTML form.
$mail->Body = "A request for Vacation time was received by <b>$username</b> on $date.
<br>
<br>
<b>Last Working Date:</b>
<br>
$lastworkdate
<br>
<b>Vacation Dates Requested:</b>
<br>
$vacdatestart To $vacdateend
<br>
<b>Return to Work Date:</b>
<br>
$returnworkdate
<br>
<br>
<b>Notes To Supervisor:</b>
If approved, please forward this request to appropriate department contact for entering into calendar.";

// Mail gets sent

if(!$mail->Send()) {
echo 'Request was not sent';
echo 'Mailer error: ' . $mail->ErrorInfo;
} else {
echo 'Thank You. Your request has been submitted.';
}
?>
<!-- Refreshes the page after 3 seconds, going back to the form. -->
<meta http-equiv="refresh" content="1;url=http://wiki.domain.com/Vacation_Planner" />

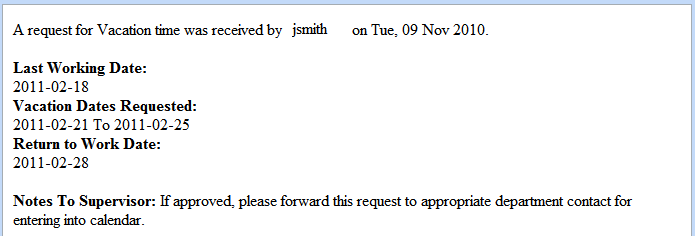
And the resulting email:

PHP email