VMM stuck logical network on NIC

I ran into an issue while setting up a new Hyper-V server in System Center VMM yesterday. I’m using a Switch Independent team on the server, and while I configured it on the host first, I started going down the path of setting up the networking using VMM components, like uplink port profiles and logical switches. At one point I decided to revert back to my original configuration, but I found that my new logical switch had a dependency on my host, despite removing all visible configuration.

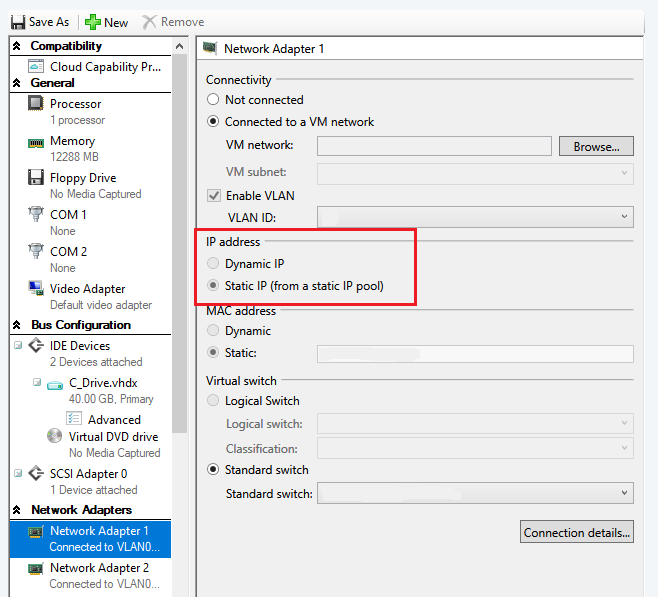
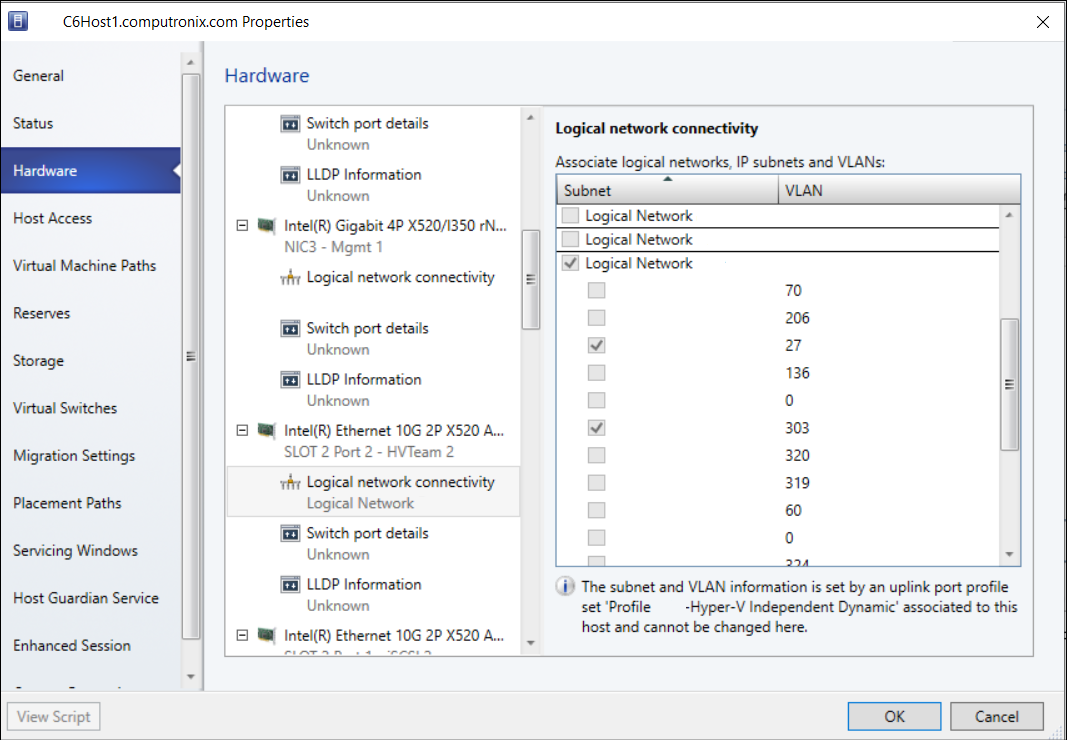
The only thing odd about this host that I could see was that on the NIC used for the Hyper-V virtual switch, it was pinned to a logical network and greyed out; I couldn’t remove it:

This is a server in a cluster, and the second host didn’t exhibit the same problem. I decided to check off a logical network on a different NIC, and then hit the “View Script” button to see the PowerShell that VMM generated, to try and reverse engineer what was happening.

The PowerShell used the cmdlets “Get-SCVMHost”, “Get-SCVMHostNetworkAdapter”, and “Set-SCVMHostNetworkAdapter”. After following those through, I ended up with a command to remove the logical network from my NIC:

Set-SCVMHostNetworkAdapter -VMHostNetworkAdapter $vmhostnetworkadapter -RemoveLogicalNetwork $logicalNetwork

However, this produced an error:

Set-SCVMHostNetworkAdapter : The selected host adapter ‘Intel(R) Ethernet 10G 4P X520/I350 rNDC #2$$$Microsoft:{F17CF86F-A125-4EE7-9DB3-0777D9935BA4}’ has an uplink
port profile set configured with network sites, so logical networks, IP subnets, or VLANs cannot be directly modified on the host network adapter. (Error ID: 25234)

When I viewed the dependency on the Uplink Port Profile, it displayed my server name; but I couldn’t see this uplink port profile anywhere in the GUI for the server.

Reviewing the docs on the “Set-SCVMHostNetworkAdapter” led me to another switch: RemoveUplinkPortProfileSet

Here’s the full PowerShell I used to remove this, which allowed me to remove my logical switch and uplink port profile.

$vmHost = Get-SCVMHost -Computername "hostname"
#Get-SCVMHostNetworkAdapter -VMHost $vmHost | select name, connectionName # Find the NIC by connectionName, so I can use the real name in the next command
$vmHostNetworkAdapter = Get-SCVMHostNetworkAdapter -VMHost $vmHost -name "Intel(R) Ethernet 10G 2P X520 Adapter"
$logicalNetwork = Get-SCLogicalNetwork -Name "logical network name"
Set-SCVMHostNetworkAdapter -VMHostNetworkAdapter $vmhostnetworkadapter -RemoveUplinkPortProfileSet


SCVMM – Change VM NIC from Static to Dynamic IP

Just a quick post to document how to make a change with System Center Virtual Machine Manager.

I have a VM with a NIC attached to a VM Network that has a Static IP Pool. For a few not-so-great reasons, I need to remove it from that pool back to a Dynamic IP address.

In the GUI, this option is disabled:

Here’s how to accomplish it with PowerShell:

# Get the virtual machine into an object
$vm = Get-SCVirtualMachine -Name "VMNAME"

# Find the destination VM Network you want to change to (the one without the Static IP Pool)
$vmnetwork = Get-SCVMNetwork -name "VMNETWORKNAME"

# Find the VM Subnet on the VM Network
$vmsubnet = Get-SCVMSubnet -VMNetwork $vmnetwork #Assume single subnet

# Using the pipe to find the NIC (assume single NIC), modify the properties to Dynamic
$vm | Get-SCVirtualNetworkAdapter | Set-SCVirtualNetworkAdapter -IPv4AddressType Dynamic -vmsubnet $vmsubnet

SCVMM VM Network dependency for Hyper-V replica

Encountered a weird issue today with SCVMM. I can’t provide screenshots since I’d have to white out object names, making it without purpose.

I wanted to delete a VM Network, however when I looked at the dependencies on it, I saw a Virtual Machine.

Looking at the Virtual Machine itself, all of its network configuration was tied to a different VM Network. For a while I really couldn’t figure out where this reference was coming from.

Then I realized that this VM has a Hyper-V Replica. SCVMM will show that replica, but you cannot open the properties of it in the GUI. However, you can query it with PowerShell. I was able to do so with this:


$VmName = "vm1"
$VM = Get-SCVirtualMachine -Name $VMName -VMHost "destination hyper-v host"
$NIC = Get-SCVirtualNetworkAdapter -VM $VM | Out-Gridview -PassThru -Title 'Select VMs vNIC'

This allowed me to view the properties of the NIC that was attached to my replica. SCVMM stores network information (not Hyper-V network info) in it’s database, and it appears that the original config was changed on my source VM, but that never made its way into the replica.

I was able to update this by adding the following two PowerShell lines:

# Pop up an OutGrid to choose the VM network you want to attach the NIC to
$VMNetwork = Get-SCVMNetwork | Out-Gridview -PassThru -Title 'Select VM Network'
Set-SCVirtualNetworkAdapter -VirtualNetworkAdapter $VM.VirtualNetworkAdapters[($NIC.SlotID)] -VMNetwork $VMNetwork

Now, I did receive an error from this last Set command, that “VMM failed to allocate a MAC address to network adapter”. However, after re-runnining the “Get-SCVirtualNetworkAdapter” I could confirm the Logical Network and VM Network were updated appropriately, and my dependency was no longer there.

I validated that this did not appear to affect the health of Hyper-V replication either.

Update – after performing the actions above, the dependency on the VMNetwork was still there when I tried to delete (but didn’t appear in the GUI). At the risk of breaking replication, I decided to try updating the VMM database directly, rather than try to figure out the best method.

I figured my Hyper-V replica VM nic was still tied to the VMNetwork in the database, despite the command I used above. So I used SQL Server Management Studio to query the tables like this:

-- Find VM Network ID
declare @var varchar(max)
SELECT @var = id FROM [VirtualManagerDB].[dbo].[tbl_NetMan_VMNetwork] where Name = 'vm network name'
-- Use output from previous command to find matching VM nics
SELECT * FROM tbl_WLC_VNetworkAdapter WHERE (vmnetworkid = @var)

This produced two rows, one for my source VM and the other for my replica. I updated the VMSubnetID and VMNetworkID columns on my replica to match the source VM.

This allowed me to successfully delete the VM Network.


Hyper-V replica health notifications

I set up Hyper-V replica between two clusters in two offices, and needed a way of keeping track of replica health. I used a PowerShell script running from a utility server on a scheduled task to accomplish this.

This script runs a “get-vmreplication” command on each cluster node, and sends an email if any is found in warning or critical state.

One issue I needed to solve was the permissions required to run this from a utility server. I’m sure there are many other (and better) ways to accomplish this such as group managed service accounts, but there are certain limitations in my environment.

First I created an account in AD to act as a service account, as a standard user. I used the “ConvertFrom-SecureString” cmdlet as demonstrated in this article, as the SYSTEM account on my utility server, to produce a file for building a credential object in my PowerShell script. To run this as SYSTEM I used “psexec -s -i powershell.exe”.

Then I created a scheduled task, set to run as SYSTEM when not logged on, at 12 hour intervals, with the action of running the script below:


$password = Get-Content C:\scripts\MaintenanceChecks\SecureString.txt | ConvertTo-SecureString
$Credential = New-Object System.Management.Automation.PSCredential("svc.clusterhealth@domain.com",$password)	

$Servers = @("ClusterHost1","ClusterHost2","ClusterHost3","ClusterHost4")

Foreach ($server in $Servers)
{
	Invoke-Command -credential $credential -computername $server -scriptblock {

		$resultsWarn = get-vmreplication | where-object {$_.Health -like "Warning"} 
		if ($resultsWarn)
		{
			$smtpServer = "relay.domain.com"
			$port = "25"
			$message = New-Object System.Net.Mail.MailMessage
			$message.From = "fromaddress@domain.com"
			$message.Sender = "fromaddress@domain.com"
			$message.To.Add( "toaddress@domain.com" )
			$message.Subject = "Replication Health Warning - $($Using:server)"
			$message.IsBodyHtml = $true
			$message.Body = "Replication health was found to be in warning state for the following VMs:  $($resultsWarn.Name)"
			$Client = New-Object System.Net.Mail.SmtpClient( $smtpServer , $port )
			$Client.Send( $message )
		}

		$resultsCrit = get-vmreplication | where-object {$_.Health -like "Critical"} 
		if ($resultsCrit)
		{
			$smtpServer = "relay.domain.com"
			$port = "25"
			$message = New-Object System.Net.Mail.MailMessage
			$message.From = "fromaddress@domain.com"
			$message.Sender = "fromaddress@domain.com"
			$message.To.Add( "toaddress@domain.com" )
			$message.Subject = "Replication Health Critical - $($Using:server)"
			$message.IsBodyHtml = $true
			$message.Body = "Replication health was found to be in CRITICAL state for the following VMs: $($resultsCrit.Name)"
			$Client = New-Object System.Net.Mail.SmtpClient( $smtpServer , $port )
			$Client.Send( $message )
		}
	}
}


Server 2016 VM freeze up

I recently deployed a couple Server 2016 virtual machines within my environment, and have been having an issue with them freezing up after periods of inactivity. Symptoms would be inaccessible on the network, locked up from the Hyper-V console (i.e. unresponsive to the Ctrl+Alt+Del command), and not responding to any shutdown commands (from Hyper-V or command line).

I initially thought this might be an incompatibility with the hypervisor, as it is still Server 2012 R2, or perhaps a missing hotfix/update but after some research this doesn’t seem to be the case.

Yesterday I finally hit on a lead sourced from this discussion thread, which indicates the problem originates from the Pagefile being sourced on a separate VHDX.

Turns out this is exactly how I configure my VMs, so that if I ever decide to protect or Hyper-V replica the VM I can exclude it.

The resolution for this particular issue is to:

  • Right click Start Menu
  • Choose “System”
  • Click “Advanced System Settings”
  • Under Startup and Recovery, click “Settings”
  • Change the Write debugging information dropdown to “None”

The implications of this setting are that if Windows crashes due to unexpected failure, it will not create a memory dump file. More detail can be found here.