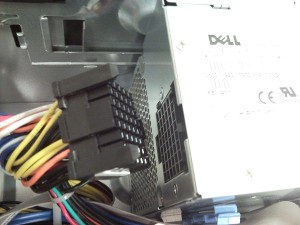
Thanks Dell for doing this on the Precision T3400:
Screw you Dell for NOT doing this on pretty much any other desktop:
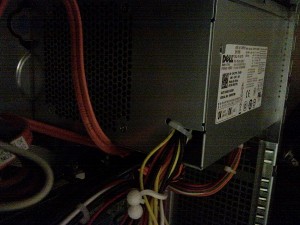
It can’t be that costly to just use quality power supplies across all platforms, and it would definitely speed up my work.
Over Christmas I deployed a two node Hyper-V Failover Cluster with a Dell MD3220i SAN back end. Its been running for almost a month with no issues, and I’m finally finishing the documentation.
My apologies if the documentation appears “jumpy” or incomplete, as half was done during the setup, and the other half after the fact. If you’d like clarification or have any questions, just leave a comment.
I have implemented this using the following:
The only hardware related information I’m going to post is in regards to the network design. Everyone’s power and physical install is going to be different, so I’ve left that out.
Only connect one LAN port from each server until you have NIC teaming set up.
With this setup, the two onboard NICs for each host will be NIC Teamed and used as LAN connections. The 4 other NICs will be iscsi NICs, with two ports going to each controller on the MD3220i.
As you can see, each NIC has its own subnet; there is a total of 8 subnets for the iscsi storage, with 2 devices (Host NIC and Controller NIC) in each.
I tried this at one point with 3 NICs per host for iSCSI, so that the 4th would be dedicated for Hyper-V management, but I ran into nothing but problems.
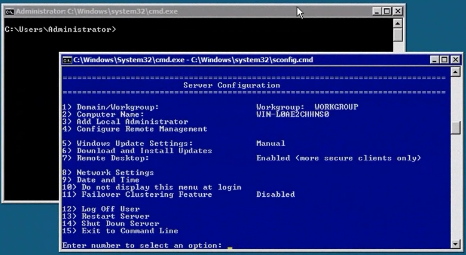
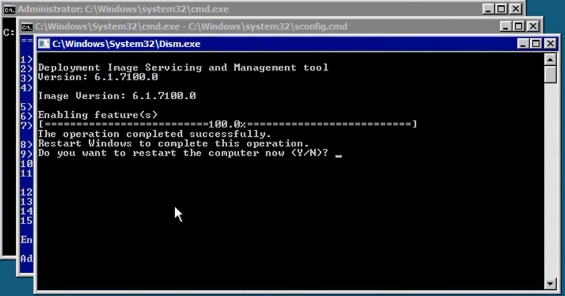
From settings done previously, you should be able to use Remote Desktop to remote into the servers now. However, additional changes need to be made to allow device and disk management remotely.
The best way to manage a Hyper-V environment without SCVMM is to use the MMC snap-ins provided by the Windows 7 Remote Server Administration Tools. (Vista instructions below).
Windows 7 RSAT tools
Once installed, you need to enable certain features from the package. In the Start Menu, type “Programs”, and open “Programs & Features” > “Turn Windows Features on or off”.
When you reach that window, use these screenshots to check off the appropriate options:
Hyper-V Management can be done from Windows Vista, with this update:
Install this KB: http://support.microsoft.com/kb/952627
However, the Failover Cluster Manager is only available within Windows Server 2008 R2 or Windows 7 RSAT tools.
You may also need to enable firewall rules to allow Remote Volume Management, using this command from an elevated command prompt on your client:
netsh advfirewall firewall set rule group="Remote Volume Management" new enable=yes
This command needs to be run on the CLIENT you’re accessing from as well.
The IP Addresses of the storage network cards on the Hyper-V hosts needs to be configured, which is easier once you can remote into the Hyper-V Host.
With the Dell R410’s, the two onboard NICs are Broadcom. To install the teaming software, we first need to enable the dot net framework within each Hyper-V host.
Start /w ocsetup NetFx2-ServerCore
Start /w ocsetup NetFx2-ServerCore-WOW64
Start /w ocsetup NetFx3-ServerCore-WOW64
Copy the install package to the Hyper-V host, and run setup.exe from the driver install, and install BACS.
When setting up the NIC Team, we chose 802.3ad protocol for LACP, which works with our 3COM 3848 switch.
For ease of use you’ll want to use the command line to rename the network connections, and set their IP addresses. To see all the interfaces, use this command:
netsh int show interface
This will display the interfaces that are connected. You can work one by one to rename them as you plug them in and see the connected state change.
This is the rename command:
netsh int set int "Local Area Connection" newname="Servername-STG-1"
And this is the IP address set command:
netsh interface ip set address name="Servername-STG-1" static 10.0.2.3 255.255.255.0
Do this for all four storage LAN NIC’s on each server. To verify config:
netsh in ip show ipaddresses
If the installation of BACS didn’t update the drivers, copy the folder containing the INF file, and then use this command from that folder:
pnputil -i -a *.inf
If you can’t access the .inf files, you can also run the setup.exe from the command line. This was successful for the Broadcom driver update and Intel NICs.
We use a combination of SNMP through Cacti, and Dell OpenManage Server Administrator for monitoring. These Hyper-V Hosts are no exception and should be set up accordingly.
To set up SNMP, on the server in the command line type
start /w ocsetup SNMP-SC
You’ll then need to configure the snmp. The easiest way to do this is to make a snmp.reg file from this text:
Windows Registry Editor Version 5.00

[HKEY_LOCAL_MACHINE\SYSTEM\CurrentControlSet\Services\SNMP\Parameters]
"NameResolutionRetries"=dword:00000010
"EnableAuthenticationTraps"=dword:00000001

[HKEY_LOCAL_MACHINE\SYSTEM\CurrentControlSet\Services\SNMP\Parameters\PermittedManagers]
"1"="localhost"
"2"="192.168.0.25"

[HKEY_LOCAL_MACHINE\SYSTEM\CurrentControlSet\Services\SNMP\Parameters\RFC1156Agent]
"sysContact"="IT Team"
"sysLocation"="Sherwood Park"
"sysServices"=dword:0000004f

[HKEY_LOCAL_MACHINE\SYSTEM\CurrentControlSet\Services\SNMP\Parameters\TrapConfiguration]

[HKEY_LOCAL_MACHINE\SYSTEM\CurrentControlSet\Services\SNMP\Parameters\TrapConfiguration\swmon]
"1"="192.168.0.25"

[HKEY_LOCAL_MACHINE\SYSTEM\CurrentControlSet\Services\SNMP\Parameters\ValidCommunities]
"swmon"=dword:00000004
Copy it to the server, and then in the command line type:
regedit /s snmp.reg
Then add the server as a device in Cacti and begin monitoring.
To install OMSA on Hyper-V Server 2008 R2, copy the files to the server, and then from the command line, navigate to the folder that contains sysmgmt.msi, and run this:
msiexec /i sysmgmt.msi
The install will complete, and then you can follow the instructions for setting up the email notifications which I have found from this awesome post:
http://absoblogginlutely.net/2008/11/dell-open-manage-server-administrator-omsa-alert-setup-updated/
The MD3220i needs to be configured with appropriate access and network information.
Before powering on the MD3220i, see if you can find the MAC Addresses for the managment ports. If so, create a static DHCP assignment for those MAC’s aligning with the IP configuration you have designed.
Otherwise, the default IP’s are 192.168.128.101 and 192.168.128.102
The MD Storage Manager software needs to be installed to manage the array. You can download the latest version from Dell.
Once installed, do an automatic search for the array so configuration can begin.
Ensure that email notifications are set up to the appropriate personnel.
We have purchased the High Performance premium feature. To enable:
Below is an image of our disk group, virtual disk, and CSV design. What works for us may not be most suitable for everyone else.

Each virtual disk maps to a virtual machine’s drive letter.
My only concern with this setup is the 2 TB limit for a VHD. By putting our DFS shares into a VHD, we will eventually approach that limit and need to find some resolution. At the moment I decided this was still a better solution than direct iscsi disks.

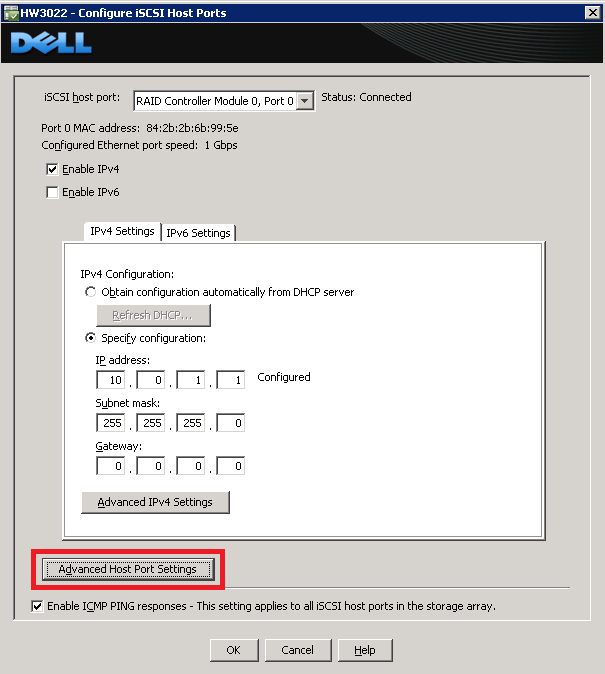
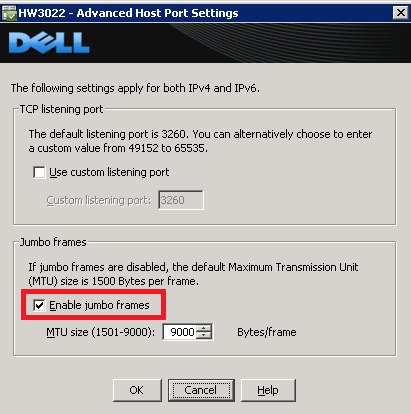
start /w ocsetup MultipathIo
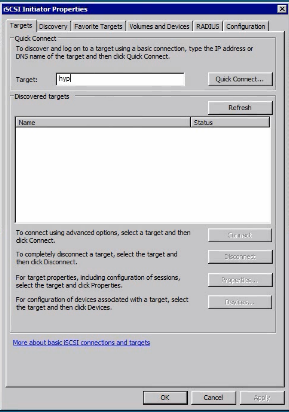
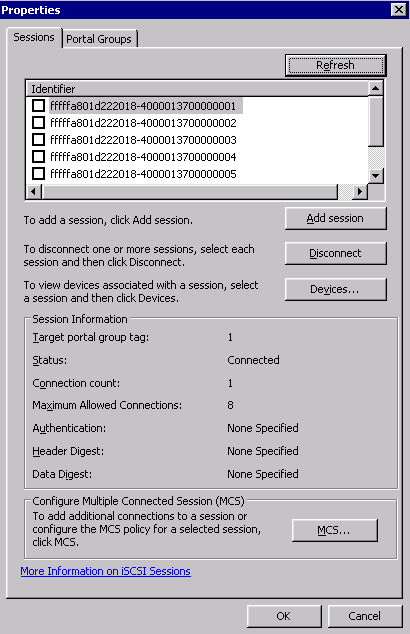
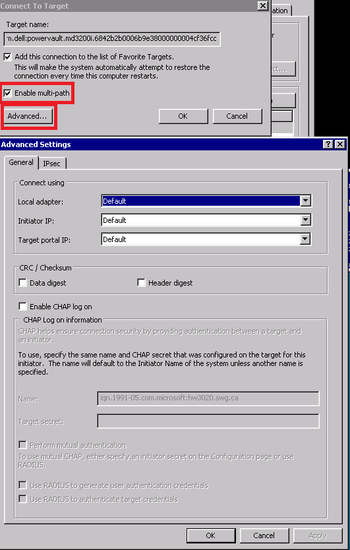
Now we should be able to go to disk management of a single server, create quorum witness disk and your simple volumes.
If you haven’t performed the steps in the Remote Management & Tools section, do so now.
Those steps only need to be applied to a single server, since its shared storage.
Further disk setup happens after the Failover Cluster has been created.
To enable jumbo frames, I followed the instructions found here:
http://blog.allanglesit.com/2010/03/enabling-jumbo-frames-on-hyper-v-2008-r2-virtual-switches/
Use the powershell script from there, for each network card. This MUST be done after IP addresses have been assigned.
To use the powershell script, copy it to the server, and from the command line run:
./Set-JumboFrame.ps1 enable 10.0.0.1
Where the IP address is correct for the interface you want.
On each host, configure using Hyper-V Manager.
Create new virtual network of external type, bond it to NIC’s dedicated to external LAN access. Ensure that you enable management on this interface.
Virtual Network names must match between Hyper-V hosts.
You may need to rename your virtual network adapters on each Hyper-V host afterwards, but IP addresses should be applied correctly.
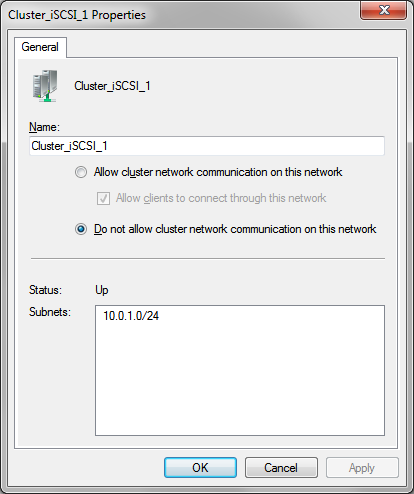
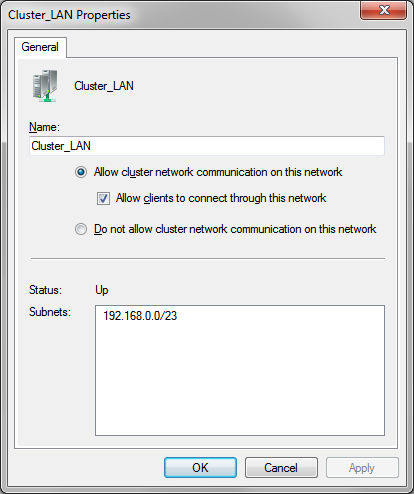
Within Hyper-V Manager, change default store for virtual machine to the cluster storage volumes (CSV) for each host.
To test a highly available VM:
Can set a specific network to use for Live Migration within each VM properties.
Enable heartbeat monitor within the VM properties after the OS Integration tools are installed.
Hyper-V Bare Metal to Live Migration in about an hour
Hyper-V Failover & Live Migration
http://technet.microsoft.com/en-us/edge/6-hyper-v-r2-failover–live-migration.aspx?query=1
Technet Hyper-V Failover Clustering Guide
http://technet.microsoft.com/en-us/library/cc732181(WS.10).aspx
Other than what I discovered through the setup process and have included in the documentation, there were no real issues found.
Oddly enough, as I was gathering screenshots for this post, remoting into the servers and using the MMC control, one of the Hyper-V hosts restarted itself. I haven’t looked into why yet, but the live migration of the VM’s to the other host was successful, without interrupting the OS or client access at all!
Nothing like trial by fire to get the blood pumping.
A quick review of the Engenious 5611P that we have been using for a few months to connect two offices.
My company recently leased space in a building adjacent to our head office. These two buildings are separated by 250 feet of parking lot, with clear line of sight.
We wanted network connectivity for data, as well as Voice Over IP, so that an additional phone system and receptionist aren’t required.
A wireless link is the obvious solution in this case, and we started with a Cisco WAP4410N. The interface for these devices was good, and setup was quick. We used the draft-N protocol and setup a WPA2 secured WDS bridge.
For ease of install we placed the two devices within the building behind the window.
Performance was acceptable, and after a few tests we deemed the link good. However, after about a week of activity in the office, there were severe performance issues, with packets dropping frequently and the Cisco devices locking up.
Ultimately we sourced the issue as being:
Based on that, we purchased two Engenious EOC-5611P devices, to set up an 802.11a network.
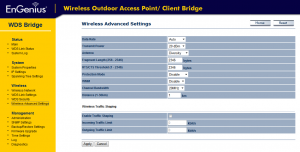
Here’s a couple screenshots of the web interface:
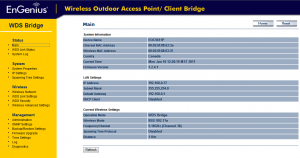
Since setting this up, the link has been rock solid, through hot weather (35 Celsius), cold weather (-40 Celsius), rain and heavy snow. (again, these are indoor behind a window). Our VOIP equipment has zero problems and we haven’t had any issues with the software on the devices.
The only downside that we have found of the Engenious devices is the lack of WPA2 encryption while using the bridge mode. Currently only WEP is supported for that mode.
I would immediately recommend these devices for anyone looking for a line of sight link, especially with 802.11a protocol. We purchased from NCIX here:
http://www.ncix.com/products/?sku=55480&vpn=EOC5611P&manufacture=EnGenius