I’ ve just completed some performance testing for an OrthoPhotography component within PCI Geomatica and thought I’d share the results. The results aren’t very surprising based on past experiences, but a little disappointing.
After repeated discussions, we purchase the following system from Dell specifically for this purpose:
Precision T5500
2 x Intel Xeon E5607 2.27 GHz
24 GB (6x4GB – 1600 MHz DDR3)
2 x 256 SSD – RAID1
2 x 1.5 TB SATA – RAID 1
2 x nVidia Quadro 2000 1GB
Total Cost: $5700
We insisted on benchmarking this desktop before it was put to production use, because we didn’t think it would perform as well as the manager thought. This desktop was considered as our baseline.
Using OrthoEngine with a 4.5GB .pix file, our existing computers (Pentium 4, 2006 era) were taking over 5 hours to complete an epipolar generation. The latest version of Geomatica is 2012, was just released, and promised support of x64 systems, and increased utilization of multiple cores and processors.
Our baseline system completed the data operation in 40 minutes, which while a huge improvement over our previous systems, isn’t surprising considering its 5 years newer.
The following table illustrates some of the findings while changing around the hardware configuration.
| Setup |
Start Time |
End Time |
Duration (minutes) |
% Change from baseline |
| Baseline |
9:48 |
10:28 |
40 |
0.0% |
| Baseline test # 2 (no change in settings) |
1:27 |
2:09 |
42 |
5.0% |
| SATA Drive (2 year old 160 GB) |
2:31 |
3:26 |
55 |
37.5% |
| Remove 1 processor |
3:47 |
4:26 |
39 |
2.5% |
| Baseline (set affinity to 1 core) |
7:23 |
8:05 |
42 |
5.0% |
| 8 GB RAM (2 x 4.0 GB RAM) |
8:31 |
9:13 |
42 |
5.0% |
From the results, we can see that there is around a 2 minute margin of error, and that:
- Older SATA drive greatly reduces performance
- Additional processor provides no benefit
- Additional cores provide no benefit
- Additional RAM above 8 GB provides no benefit
It was clear after these tests that the value of the purchased desktop was terrible. I figured it was worth doing the same benchmarking on our current standard CAD system:
Optiplex 990
Intel Core i7-2600 – 3.4 GHz
8.0 GB (2x4GB – 1333MHz DDR3)
500 GB SATA 7200rpm
ATI Radeon HD6450 1GB
Total Cost: $1480
The following are the results compared to the baseline 40 minute process:
| Setup |
Start Time |
End Time |
Duration (minutes) |
% Change from baseline |
| Test on Optiplex |
4:45 |
5:15 |
30 |
25.0% |
| Test on Optiplex (processor priority on high) |
7:19 |
7:48 |
29 |
27.5% |
| Optiplex (Geomatica 10.3) |
9:29 |
10:01 |
32 |
20.0% |
| Optiplex (4GB RAM – 1 stick) |
10:47 |
11:28 |
41 |
2.5% |
| Optiplex (with SSD) |
4:33 |
4:57 |
24 |
40.0% |
Here’s where it gets interesting. It is clear that our CAD desktop is much faster than the baseline, and this is solely by having a faster CPU clock speed.
I tried using the previous version of the software (10.3) to see if there were any improvements in the 2012 release, however at only 2 minutes slower it is effectively the same.
Dropping to 4 GB of RAM did produce a difference, but this makes sense as the data set is 4.5 GB. We can see from previous tests that having more than 8 GB of RAM made no difference.
Best overall performance was with the faster processor and an SSD.
We did another test called DEM Extraction with the resulting files from the epipolar creation process above. These were 2.5 GB files, which I’m told took multiple days to do a DEM Extraction on in our current systems.
| Setup |
Start Time |
End Time |
Duration (minutes) |
% Change from baseline |
| Baseline (Precision) |
2:09 |
7:21 (15th) |
1032 |
|
| Optiplex |
1:23 |
11:08 (14th) |
585 |
43.0% |
The baseline system did the job in 17 and a bit hours, while our CAD Desktop finished in 9 hours 45 minutes!
Since then, we’ve returned the Precision, and I’ve convinced the department manager to let us bring in a custom desktop with an Intel i7-2600k, which we’ll overclock to 4.x GHz for the best performance.
Overall, we’ve seen similar performance needs with our AutoCAD Civil 3D benchmarking where the largest performance gains were seen by having a high clock-speed CPU.
The problem now is finding 8 GB DIMMs that are unregistered, non-ECC to go into a P67 motherboard.
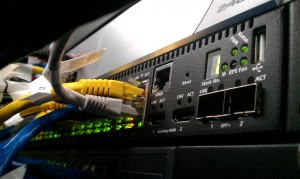 Last night I performed a network upgrade, replacing an old and potentially failing 3Com 3848, with a Dell PowerConnect 5548.