Intel Network Connections (ProSet) update or removal

Short-version: be very careful removing the Intel Network Connections software!

I’m working on a task to update NIC drivers and firmware on a Dell PowerEdge R630. It was decided during this process to remove the Intel ProSet software along with it’s generated sub-interfaces for VLAN purposes, and instead utilize switch-port configuration.

I went to uninstall Intel(R) Network Connections from appwiz.cpl, which contains ProSet. On this server, its version was 19.3.0.0. However, I quickly received an error stating that I needed to remove any Teams and VLANs. No problem, I was going to do that anyways so I went into the advanced properties of my NICs and removed the VLAN sub-interface. I wasn’t using any Intel teaming, but rather LFBO within Windows Server.

When I tried again, it still gave me the same error. I decided to try “Modify” on the uninstaller instead, and remove ProSET only.

This was successful, but then when I tried to install the latest version, it said it couldn’t update with this error:
Product: Intel(R) Network Connections — The installed version of Intel(R) Network Connections is not supported for upgrades. You must uninstall it before installing this version.

So I tried the full uninstall again, and this time it worked! Great, I’m thinking “Now I can proceed with the latest version”.

Except it removed ALL NIC config, including IP settings and advanced properties like Jumbo Frames and RSS buffer sizes.

Thankfully I had good documentation of the previous setup, and that should be your biggest takeaway if you’re reading this: always consider “what’s the worst that could happen” and then plan to mitigate that thing.

For future hosts, I left the old version of the software installed and manually updated drivers from the .INF files. Interesting to note, if you already have a higher version installed like Version 22.7, this behavior isn’t seen – you can install an update on top of it without having to uninstall.


Rapid Recovery – Force Snapshot selection empty

Using Rapid Recovery 6.1.3, on a Core protecting agents with a very low SLA, I wanted to take a manual snapshot.

When I went to do so, I found the selection list empty.


This is because none of the volumes on the agent were scheduled for protection.

I temporarily added a schedule, forced a snapshot, and then removed the schedule.

I think this is terrible design – there are legitimate reasons to avoid a schedule for some resources, and requiring configuration changes in order to instigate a snapshot introduces risk to un-managed change in an environment.

It goes further though; as this KB indicates, when you have volumes all scheduled and want just a single volume snapshot, you have to remove the schedule (better hope you took note of the settings) and then re-add it afterwards.

There are many little things like this I’ve seen in the AppAssure/Rapid Recovery product since being introduced to it that are quickly souring my opinion, especially coming from a Commvault environment which is extremely flexible and powerful.

Quest Data Protection Portal port requirements

Quest has a new Dashboard portal (Data Protection Portal – DPP) for their Rapid Recovery product, found here: https://dataprotection.quest.com

This gives a very nice overview of your environment including Cores, Machines, and Repositories, along with some level of control. Having recently been exposed to the AppAssure/Rapid Recovery product, this is a very welcome addition because the existing tools like the Central Console are very lacking in central management capabilities. I’ll do a write-up of the capabilities of this Dashboard at a later date.

The DPP requires a plugin to be installed on each Core, which will then communicate with Quest. However, I’ve got Cores in an environment with restricted Internet connectivity. Previously firewall rules were enabled to provide connectivity to the Quest License Portal over HTTP/S, but these are not sufficient for access to the new DPP.

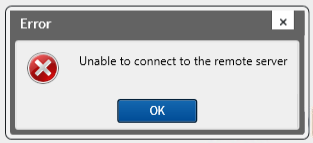
When you try to install the plugin on a Core with limited connectivity, you’ll receive this error before the install wizard appears:

Error for Portal Plugin

Unfortunately, Quest has very little detail on what ports are required, feedback which I’ve already passed along. Their Default Ports page lists connectivity requirements for various functions but not the DPP. In addition, it doesn’t list the destination names or IP in order to isolate outbound HTTP/S even further.

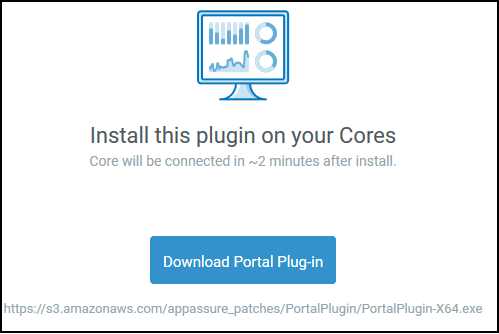
To begin resolving this, I installed WireShark on my Core, began a session, and then attempted to install the Plugin again. Right before the error appeared, I saw DNS request for “s3.amazonaws.com”, and then repeated attempts to an IP over HTTP. I knew I was on the right track because when you download the plugin from the DPP, the link directs to S3:

Plugin download from Quest

I added the FQDN “s3.amazonaws.com” as an address object permitted for outbound HTTP/s access, and attempted to install the plugin again. This time I received a successful prompt to begin the install wizard.

When I run WireShark now, I can see the DNS query, requests for a manifest, and then further on a switch to HTTPs communication (rather than port 80 that it starts with):

Wireshark trace of successful packets

I’d really love to restrict this rule down further than the FQDN of S3, so I’ve opened a case with Quest and will update this post if I get a better option.

Now that the install is done, I went looking at the DPP to ensure my Core was communicating, and found that it was not.

Back to WireShark, I started another session and saw a different set of traffic:

Wireshark trace of DPP communication

A DNS request for “api.licenseportal.com” is completed, and then HTTPs communication that is pretty clearly traffic to the DPP. If one does a reverse DNS lookup on “dataprotection.quest.com” you get an Azure-bound IP address (related to the CNAME resolution in the screenshot above), and if you hit the resolved IP in a browser, you get a certificate warning with a wildcard cert for *.licenseportal.com which is a known Quest domain name.

I added this as an additional FQDN object, and now the Core is displaying data within the DPP. I have now removed the S3.amazonaws.com permission as it is only apparently necessary for the installation.

Project Honolulu and Server Core

By now many IT administrators have heard of Project Honolulu from Microsoft. I must admit, when I heard the headline and initial talk about it, I book-marked the info intending to come back but didn’t really dig into it. I thought, “oh a revamped Server Manager.”

My perspective is all changed now.

I’m watching the “Windows Server: What’s new and what’s next” session from Ignite 2017. I have been following Aidan Finn’s blogging of Ignite sessions including this one in particular for the “What’s new” session, and recall reading his notes about Server Core being in semi-annual channel, but not Server GUI, so “you better learn some PowerShell to troubleshoot your networking and drivers/firmware”.

But now having watched the session myself, it makes Microsoft’s vision and a path forward here very clear to me.

Using Server Core allows an organization to reduce their surface area for vulnerability, streamline the size/frequency of Windows Updates, optimize performance and scalability on hardware, and stay up to date on the Windows Server cadence.

Project Honolulu makes using Server Core viable. This is the answer to the Windows system administrator saying “Server Core just doesn’t give me the visibility I need into my servers”. As Jeff Woolsey walks through the functions of Project Honolulu, it is obvious that THIS is where the visibility will be; no more RDP into individual servers to manage their roles, devices, and settings. No more MMC windows to open Event Viewer and Shares and other applets.

Now I’m excited.

Azure PowerShell DNS – Modify TTL

A brief note on modifying TTL on an Azure DNS record set. This is changed on the record set, not the record itself.

The Azure DNS PowerShell docs don’t make it explicitly clear how to do this, however using “help set-AzureRmDnsRecordSet -examples” gave me a clue on how to achieve it.

The key is the middle line here:

$rs = Get-AzureRmDnsRecordSet -Name "msoid" -RecordType CNAME -ZoneName "domain.com" -ResourceGroupName "DNS"
$rs.TTL = 3600
Set-AzureRmDnsRecordSet -RecordSet $rs