Migrate Azure Managed Disk between regions

This post is a reference for needing to move an Azure Managed Disk between regions. It is based on this Microsoft Docs article.

There are legacy posts containing information to use Az PowerShell to basically do a disk export to blob storage (with a vhd file) and then import that.

This procedure skips those intermediate steps, and uses AzCopy to do it directly.

If there’s no active data changing on the disk, you could consider taking a snapshot and then producing a new Managed Disk from your snapshot to perform the steps below – this way you wouldn’t need to turn off the VM using the Disk. However, the situations where this might be viable are probably rare.

You will need to:

First, shut down and deallocate your VM.

Then open a PowerShell terminal and connect to your Azure subscription.

Then populate this script, and execute each command in sequence.

# Name of the Managed Disk you are starting with
$sourceDiskName = "testweb1_c"
# Name of the resource group the source disk resides in
$sourceRG = "test-centralus-rg"
# Name you want the destination disk to have
$targetDiskName = "testweb1_c"
# Name of the resource group to create the destination disk in
$targetRG = "test-eastus2-rg"
# Azure region the target disk will be in
$targetLocate = "EastUS2"
 
# Gather properties of the source disk
$sourceDisk = Get-AzDisk -ResourceGroupName $sourceRG -DiskName $sourceDiskName
 
# Create the target disk config, adding the sizeInBytes with the 512 offset, and the -Upload flag
# If this is an OS disk, add this property: -OsType $sourceDisk.OsType
$targetDiskconfig = New-AzDiskConfig -SkuName 'Premium_LRS' -UploadSizeInBytes $($sourceDisk.DiskSizeBytes+512) -Location $targetLocate -CreateOption 'Upload'
 
# Create the target disk (empty)
$targetDisk = New-AzDisk -ResourceGroupName $targetRG -DiskName $targetDiskName -Disk $targetDiskconfig
 
# Get a SAS token for the source disk, so that AzCopy can read it
$sourceDiskSas = Grant-AzDiskAccess -ResourceGroupName $sourceRG -DiskName $sourceDiskName -DurationInSecond 86400 -Access 'Read'
 
# Get a SAS token for the target disk, so that AzCopy can write to it
$targetDiskSas = Grant-AzDiskAccess -ResourceGroupName $targetRG -DiskName $targetDiskName -DurationInSecond 86400 -Access 'Write'
 
# Begin the copy!
.\azcopy copy $sourceDiskSas.AccessSAS $targetDiskSas.AccessSAS --blob-type PageBlob
 
# Revoke the SAS so that the disk can be used by a VM
Revoke-AzDiskAccess -ResourceGroupName $sourceRG -DiskName $sourceDiskName
 
# Revoke the SAS so that the disk can be used by a VM
Revoke-AzDiskAccess -ResourceGroupName $targetRG -DiskName $targetDiskName


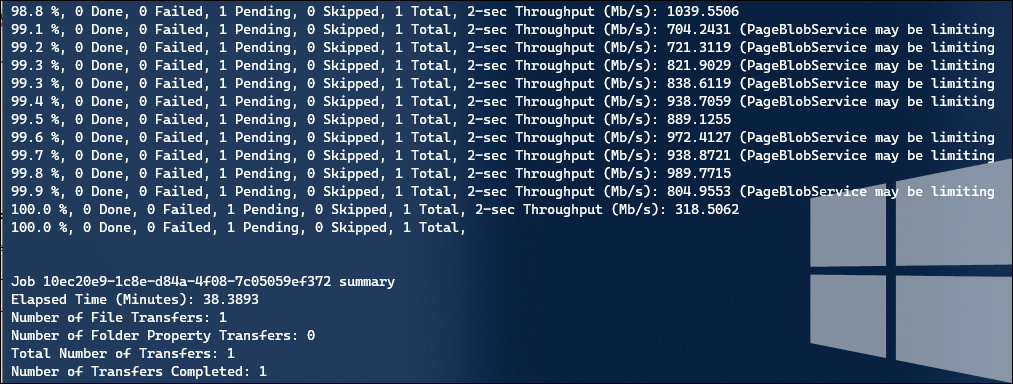
When you get to the AzCopy step, you should see results something like this:

In my experience, the transfer will go as fast as the slowest rated speed for your managed disk – the screenshot above was from a Premium P15 disk (256 GB) rated at 125 MBps (or ~ 1 Gbps).
 

Azure WAF Policy and Application Gateway limitation

Today I encountered a concerning product limitation of the Azure Application Gateway and Web Application Firewall (WAF) Policies.

Some background first – when working with an Application Gateway v2 sku, you can apply a WAF in 2 different ways:

Microsoft’s documentation appears to be updated to display a preference for using the WAF Policy object, including a scripted method for converting to it: Migrate Web Application Firewall policies using Azure PowerShell

I moved to using a WAF Policy because I wanted to use a series of Terraform local variables to supply WAF rule configuration (exclusions) to both Application Gateway and Azure FrontDoor WAF Policies, without duplicating code.

But there is a severe limitation that you may not have noticed in the docs:

You might think, “that’s not a problem, I shouldn’t ever need to disassociate my application gateway” but here’s where it gets wild.

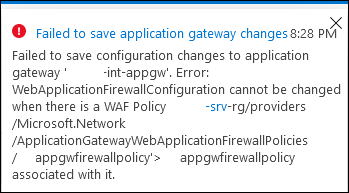
Let’s say that you decide you under-sized your Application Gateway, and want to increase the maximum scale units, or set it to auto-scale. You go to the Configuration blade, and modify the setting, and then hit “save”. You will see this error:

Uh-oh.

You can try to disassociate the policy in the Portal, but you’ll just see this:

What if we try to disassociate the Policy in PowerShell?

"Firewall policy cannot be removed from Application Gateway, changing from one firewall policy to another is permitted."

This is the limitation – once you’ve applied a WAF Policy, the only way to make a configuration change against the Application Gateway is to destroy it and re-create it. This is absolutely crazy, and means I will not deploy another WAF Policy object until it is resolved. Generally speaking one wouldn’t expect to be changing the AppGw configuration often, but being stuck like this not a good place to be in.

Other’s have talked about this like on ServerFault with a suggestion to shut down the AppGw (not effective) or this issue on azure-cli describing the limitation. To date I haven’t found any viable workaround.


Terraform console output

Official doc: https://www.terraform.io/docs/commands/console.html

“terraform console” is a command you can run, which gives you the opportunity to evaluate expressions and interpolation – very useful while building terraform.

To use it, on the command line, navigate to your terraform folder, and then run

terraform console

You will be met with this prompt (which doesn’t support any history through the “up” arrow key ?):

Here you can enter Terraform syntax and press enter to see the results.

Lets take a look at a resource group that exists in my configuration:

I entered in “azurerm_resource_group.mpn-trainlab-rg” and the console output all the properties in the state file for this resource.

I could further define my entry to a single property, and get this:

Now we can try this with some of our input variables. Lets say I have a complicated variable that I’m using to define disks, and I want to make sure when I reference that on a resource, its going to work:

data_disks = {
    ti-web = {
      count = 1
      size  = 64
      sku   = "Standard_LRS"
      caching = "ReadWrite"
    }
    production_u02 = {
      # Take the total data size you want, and divide it by the count of disks you want, to determine size
      count   = 4
      size    = 256
      sku     = "Premium_LRS" # Standard_LRS
      caching = "None"
    }
}

If I enter “var.data_disks” in the console, I would expect to get the exact same output as the code above, in JSON notation (lots of extra quotes and colons).

What if I’m trying to get the size of just the ti-web disk?

Looks like it works! Now I know on the resource for the “size” property, I can use “var.data_disks.ti-web.size” as a reference and it will provide my expected value.

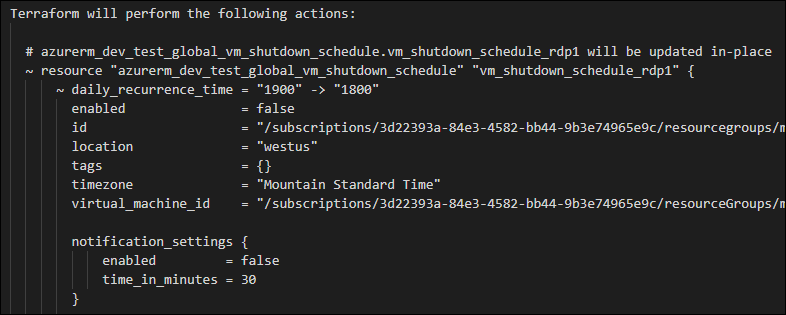
Terraform plan output to file

A quick note to myself on how to get terraform plan output as a file.

By default running a “terraform plan” will output a nice graphical display of all expected changes. Sometimes you want to be able to distribute this as a file. In the past, I’ve tried commands like:

terraform plan > tfplan.txt

However that produces confusing output like this:


Instead, you can do this to get better output:

terraform plan -no-color > tfplan.txt

Now it will display in the console, and produce a text file that looks like this:

Azure B-Series CPU Credit workbook in Azure Monitor

Today I produced a workbook for Azure Monitor that can help watch CPU Credit utilization for Azure B-Series VMs. If you’re using this VM Sku, you want to be aware of trends in your compute usage to avoid credit exhaustion that would force your VM to operate at the baseline performance level instead of being able to burst above.

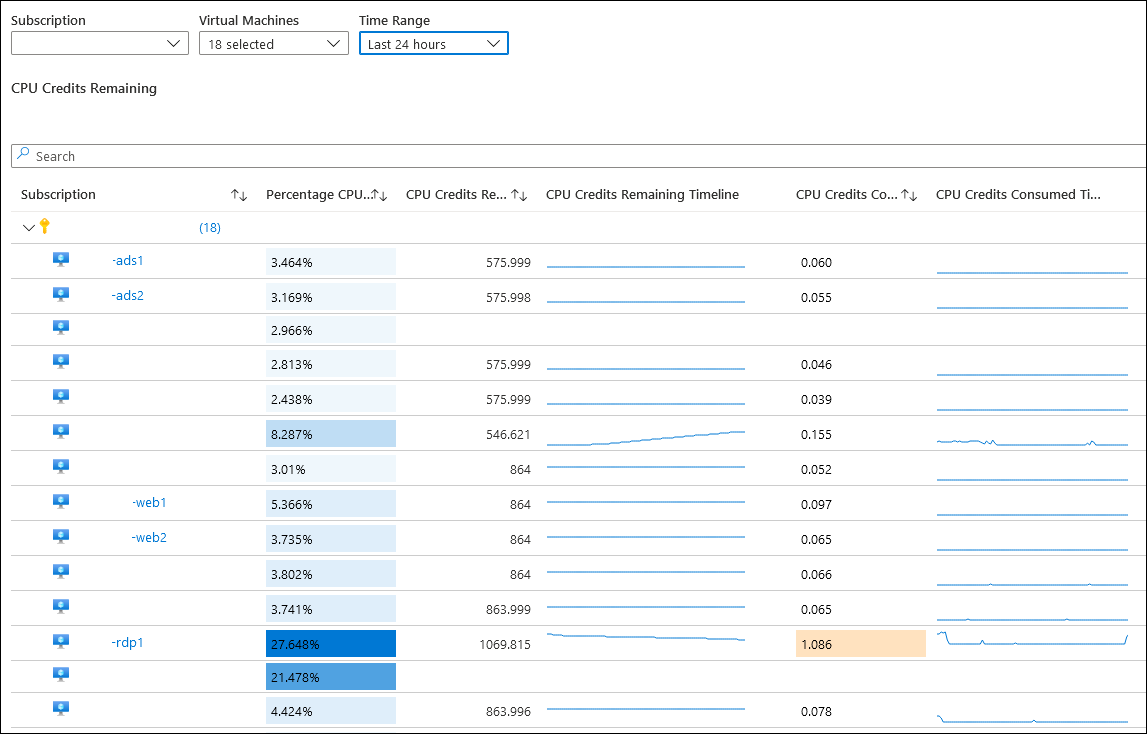
Once you import this into Azure Monitor, you will have a very easy way to view CPU credits remaining, consumed, and CPU usage for all virtual machines in a subscription.

To get started, grab the gallery JSON of the workbook from here: CPU Credits Remaining.workbook

  • This is currently in a branch of my own fork of the Azure Monitor Community repository – this will be updated when my pull request is approved and merged

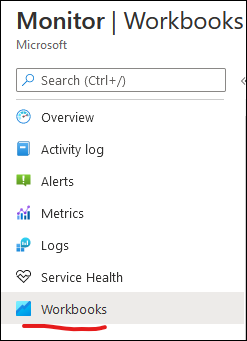
In the Azure Portal, navigate to Azure Monitor -> Workbooks:

Select “New” from the top menu, and then click the advanced editor to be able to paste the JSON code:

Then click the “Apply” button and you should see the Workbook load. Make sure to save this and give it a name!

You should see a workbook that gives you the capabilty to filter by subscription, and set the metric time-range, along with a display for each VM. The trendlines may not show much graphically at 1-hour intervals, but change it to 12 or 24 hours and you’ll begin to see more movement (assuming variable CPU usage).

This workbook doesn’t filter out VMs that are NOT B-series VMs, so areas where the table is blank are because those VMs don’t have credits at all.